
So, the PCB strips finally arrived, and they turned out very well. My initial design seemed pretty solid until I realized that I had packed about 2.5x as many LEDs as were on the strips I'm currently using on my display cases.
Unfortunately, this might've been a problem.
I went ahead and ditched the 82Ω resistors and built one out with 100Ω current limiting resistors. This helped out slightly as the current draw came in at around .4A. The second board used 150Ω resistors, and that brought it down further to .28A which is more acceptable.
This would place the total power draw per display case down to around 40W (12V at 3.75A) which fits comfortably inside the standard 12V/5A power bricks.

Design Problems/Fixes
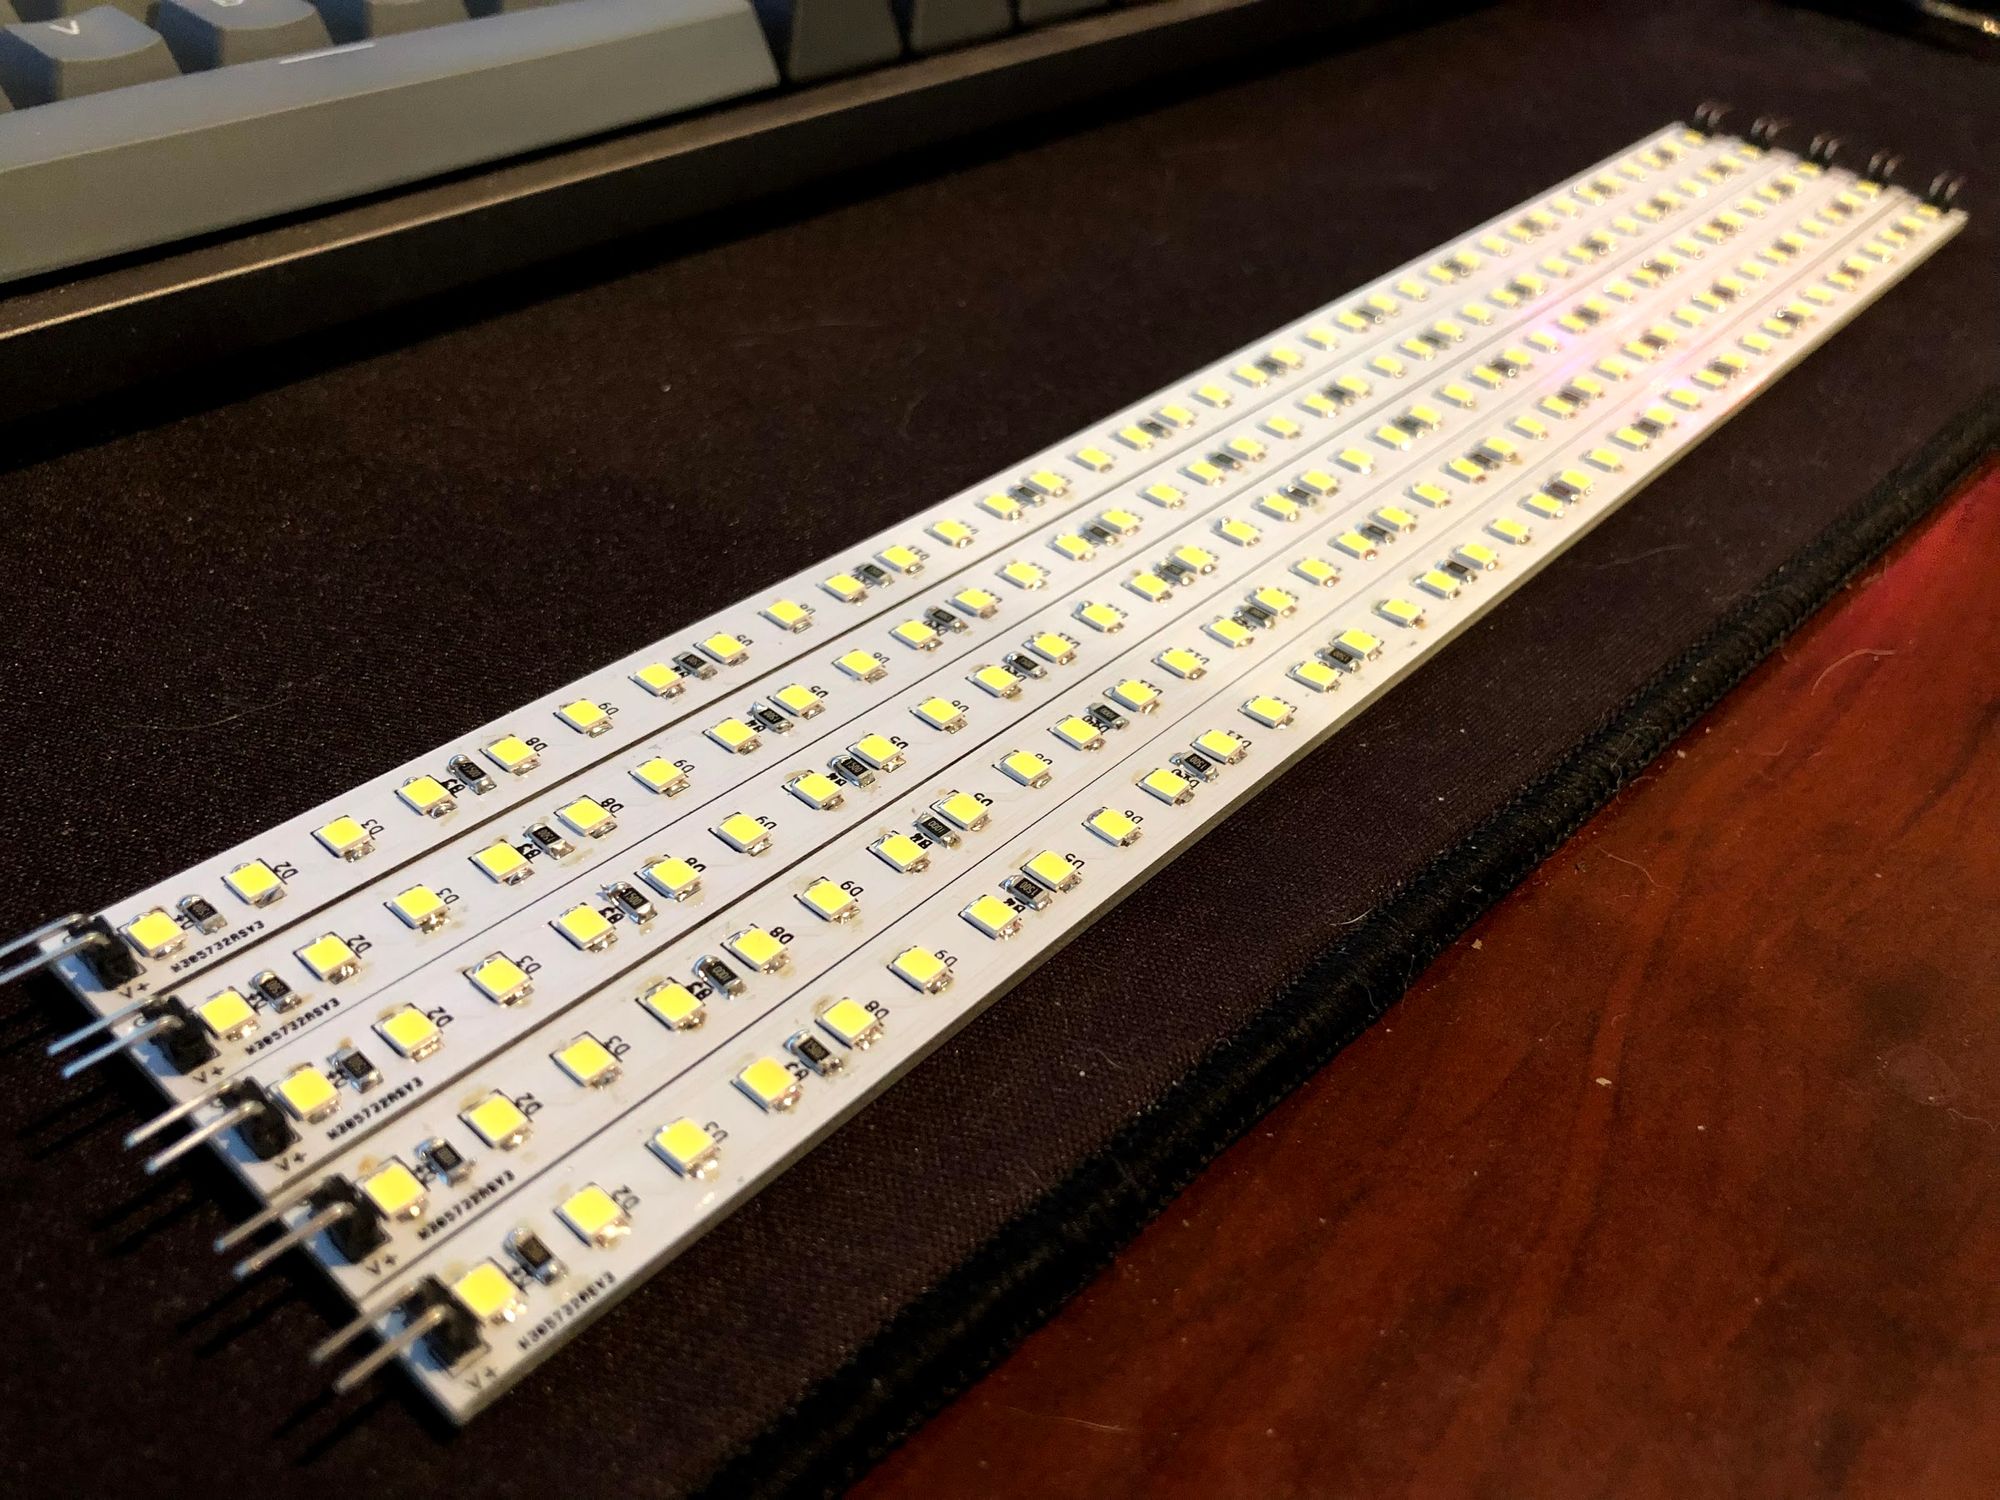
I had the initial idea of using screw terminals on the edges of the strips to make installation a bit easier, but that fell through once I realized I didn't leave enough PCB space for them. The screw terminals (0.1"/2.54mm pitch) ended up covering the first and last LEDs
So, I found some 90° 2.54mm pin headers and decided to use them for testing until I could fix the issue on the PCB design. However, these seem to actually work better.

With the current draw fixed, and the connectors sorted out, I went ahead and made sure that the strips wouldn't catch fire or produce too much heat with continuous operation. They do put out a bit of heat, but not enough that I'm really worried about them being installed in a case.
Of course, I say that. I will be installing them in my case just to make sure, but I still need to make more strips. Unfortunately, each strip has 36 white LEDs and 12 150Ω resistors that need to be soldered in, and I ran out of resistors. Once they come in I will finish up the first kit and get it installed.
Wish me luck on that one.
ALL OF THE LIGHT!11!!1!
So, here are a few photos of the finished product.


Where to Go Next?
So, the next part is full case testing, getting in the right cables to connect the LED strips together with, and to see how much it will take to get these manufactured and the minimum order size. The shelf splitters are fairly easy to make, but these strips require a ton of manual effort.
I do not want to solder more of these LED strips unless I absolutely have to.
Once the 150Ω resistors come in, I'll get 8 more strips built out and start the installation process. If everything looks good there, I'll go ahead and start seeing what I need to do to get these kits in order.
Until then, I'm going to enjoy Christmas with the folks and take a break from soldering...well, until my relays come in and...I need fewer projects.